The Best Photography Kit for TravelBlogging
Wherever you go, your photography kit goes also. How do you decide which gear to bring? I shortly review the best kit for traveling and blogging with the most adventurous places in mind. I suggest a basic kit that you can customize my asking yourself what type of pictures will you be taking, and how much gear you will want to pack around.
What Photography Kit Should I Buy?
Depending on your confidence and practice on the essential functions of your DSLR camera, the basic photographic terminology (rule of thirds, exposure triangle, etc.), and the lighting and composition techniques you may add photography kit as long as your wallet support it. You may check my post on the practicalities of photography techniques. In general, I purchase from Amazon because warranties are better, it provides additional insurance, and I can get my money back without questions. In the following section, I recommend what I own and I think it is the best option. You will find affiliate links to my purchases, feel free to buy elsewhere if you get better prices (but I don’t think…).
Camera
Well, one of the fundamental items of your photography kit is the camera. First, you need to get a DSLRs at a reasonable price; for instance, you can buy a renewed/used product from Amazon, Adorama, or BHPhoto, just ask for the internal shots counter. Indeed, the main constraint for life expectancy is the shutter mechanism, ranging from 50000~400000 whereas the sensor may last 2-3 shutter replacement before showing visible (and not resolvable) defects on photographs. You can find technically comparable alternatives with Nikon, Sony, or Fuji in similar price ranges; however, you will be locked in for lenses and Canon is usually cheaper although qualitatively excellent. I own a Canon 7D and a Nikon D70.
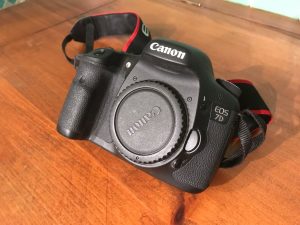
Canon EOS 7D (discontinued), you just need to upgrade the firmware.
Canon EOS 7D MKII (newer), upgraded sensor and firmware.
I STRONGLY suggest you buy insurance with it, it’s cheap and covers all the gray areas of DSLR warranties and markets. If they don’t provide, don’t buy because a good DSLR will last more than 10 years and every insurer is keen to sell you insurance for such products (but less for damage/loss/rob).
Second, you need a photo retouching software supporting the raw format of your DSLR. Adobe products are the industry standard, but some free alternatives exist; you may check my post about raw processing.
Lenses
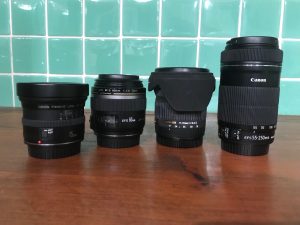
A versatile lens for a range of travel photos like cities, Europe, architectural: any standard 18-55mm kit lens will do, I personally use a Sigma 17-70 all-purpose lens with Hyper Sonic Motor and Optical Stabilizer.
For safaris, wildlife, or anytime you need a long-range zoom lens: any 70-200mm or a 70-300mm will balance performance with weight; I own a Canon 55-250 corresponding to a 35mm-equivalent focal length of 88-400mm with STM stepping focus motor and Optical image stabilization.
Evening and low light situations: any fast lens with a wide aperture; however, you may get a wide angle with f2.8 and a portrait lens (see below). Personally, I use the Canon 15mm fisheye with a 180-degree angle of view and minimum focusing distance of 8 inches. You can correct and obtain a rectilinear shot with Photoshop.
Portraits, lifestyle photos, street photography, or close-ups of small details: any 50mm, 60mm, or 100mm macro lens. I prefer the Canon 60mm (equivalent to 96mm lens on 35mm camera) because it is a real macro lens (1:1 magnification) and because of its f/2.8 maximum aperture, 25-degree angle of view, and ultra-sonic monitor autofocus.
Lens and Camera Accessories
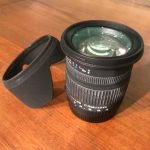
Polarizing filters may help in protecting lenses and sensors, substantially a circular polarizer diffracts unaligned (i.e., unpolarized) light away to erase reflections from your photos or to deflect the glare from the sun away. You may need one for each lens; however, I don’t use it because I prefer tulip flower lens hoods (cheaper and give substantially the same result in 95% of uses). Usually, they are included with all-purpose lenses like the Sigma 17-70mm. However, both options require to check the compatibility with the lens attachment.
A lens cleaning kit is cheap and saves you many shoots, be sure to take a blower, brush, and specific lens papers.
Having spare memory cards is an easy way to ensure you won’t run out of space on your memory card. Buy accordingly to your DSLR sensor size. For instance, if you have 18 megapixels, you need to write at least 48 Mb/s to shot twice per second. Actually, DSRLs have a cache, thus you can employ slower memories but the difference in price is really small. I recommend SanDisk, but any good brand will do. Find a card reader compatible with the speed of your laptop ports and external drive.
Consider one or more external USB drives; I use two Toshiba Hd 1Tb because they are portable with a real USB3.0 interface. You need to reformat for Mac Os.
Bags and Covers
This is an important part of your photography kit; indeed, make sure your lenses are protected and ready for travel. I suggest buying a separate camera neoprene bag and lenses soft covers. As luggage, get an anonymous travel bag holding all your gear. Look for something durable and weather resistant, I generally use air-travel dimensioned bags that I customize with internal separators depending on the gear I take with me. Indeed, even if you follow the stricter bag dimensions for carry-on luggage, it may happen you have to leave your bag at the gate. Thus, having everything packed in soft neoprene allows you to take your gear with you in a plastic bag.
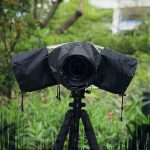
A decent rain cover is another nice-to-have accessory that can also double as packer-filler; moreover, in a lot of hot climates rain is a daily occurrence in the afternoon. Always buy nice dresses for your baby DSLR, I bought this Camera Rain Cover and I’ve used it a few times to say the gadget is cheap enough to buy even if you don’t need it.
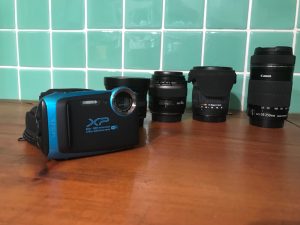
Compact Camera
A good compact may help you in difficult situations (wet, rain, etc.) or whenever it is too risky to use your reflex and you want to avoid pickpocketing in markets, train stations, etc. I’m very happy with this Fujifilm FinePix XP130 that can follow me underwater up to 20mt under sea level. The software doesn’t work under Mac Os; however, I always take out the SD or CF memory card and get the photos using a card reader connected to my laptop.
Another option for wildlife and night shots is a cheap hunting infrared camera. It records IR light beyond our visible spectrum in videos and pictures; however, not really the best in terms of usability but dirty-cheap for an overall great result. Colors, textures, leaves and plants, human skin, etc. reflect infrared light in specific and, for us, never seen ways. I’ve recorded nesting turtles in Costa Rica for the reason infrared light does not harm animals:
Tripod
A travel tripod, with all its compromises, it’s better than nothing. However, you can patch its lightness with a small bag of stones attached to it. It is a must for sunset photos, but also for other nice shots. The model (Sobrovo nt688) I bought includes 3D orientation, a swivel for the DSLR, an attachment for compact cameras and iPhones, and a monopode. It is really a deal for the price and will not disappoint you.
Blogging Specific Items
Your photography gear may include blogging related items useful for posts covers, featured images, or products. These items are light and can be packed even for air flight but will occupy a lot of space.
Direct sunlight is not always needed, a diffuser helps in softening the light on your subjects. Instead, in cloudy days, a reflector helps in adding light into your blog photos. An artificial umbrella lighting kit mimics natural daylight. Not everything can be corrected with Photoshop!!